 Another fun week, another fun project. This one was a doozy for me. As I was out exploring the thrift stores last week, I ran smack dab into this little beauty of a dollhouse…and knew it would be a perfect doll house for my little 2 year old to use now and later..as it is almost 6 feet tall! However..it did not quite look like the above picture, nor this:
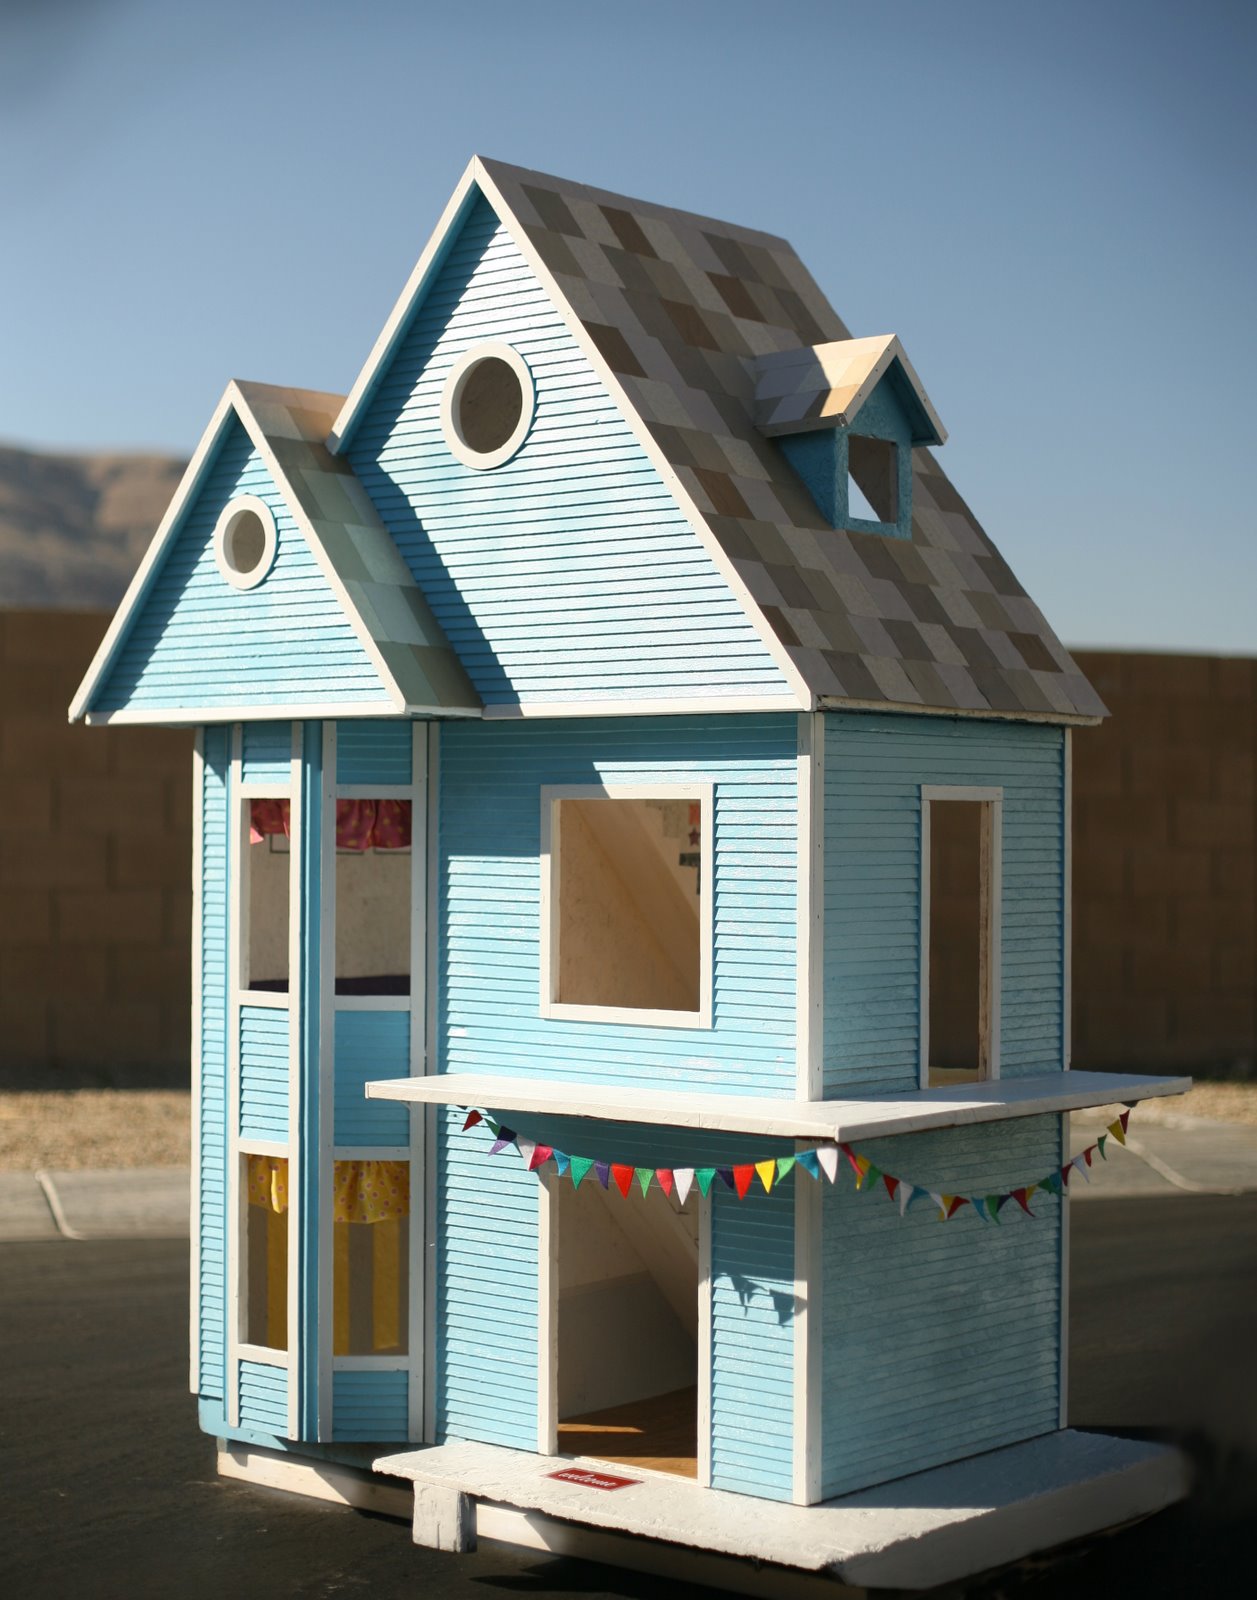
Here are the before/after shots! Can you believe it is the same dollhouse!!

It literally took me 2 full days just to get this thing prepped and painted in order for it to be able to be decoupaged! I got a little nervous in the end with time..but it all worked out, and I couldn’t be happier with the results!
Enjoy a few of the details:
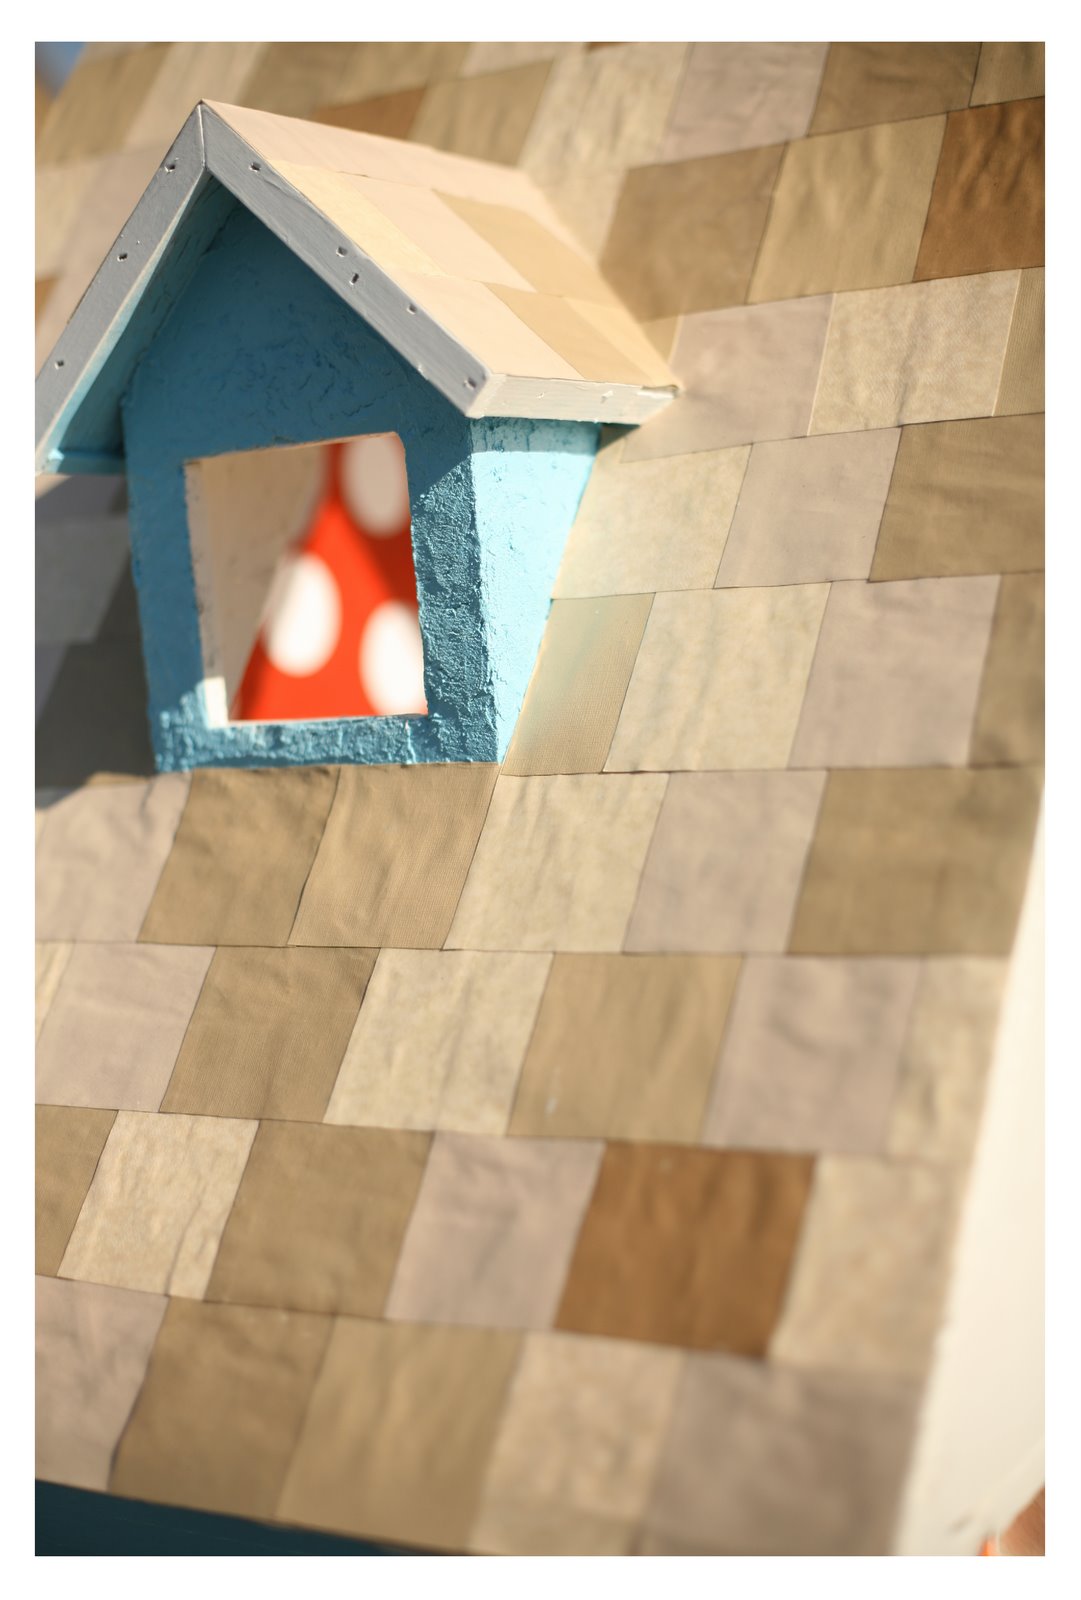
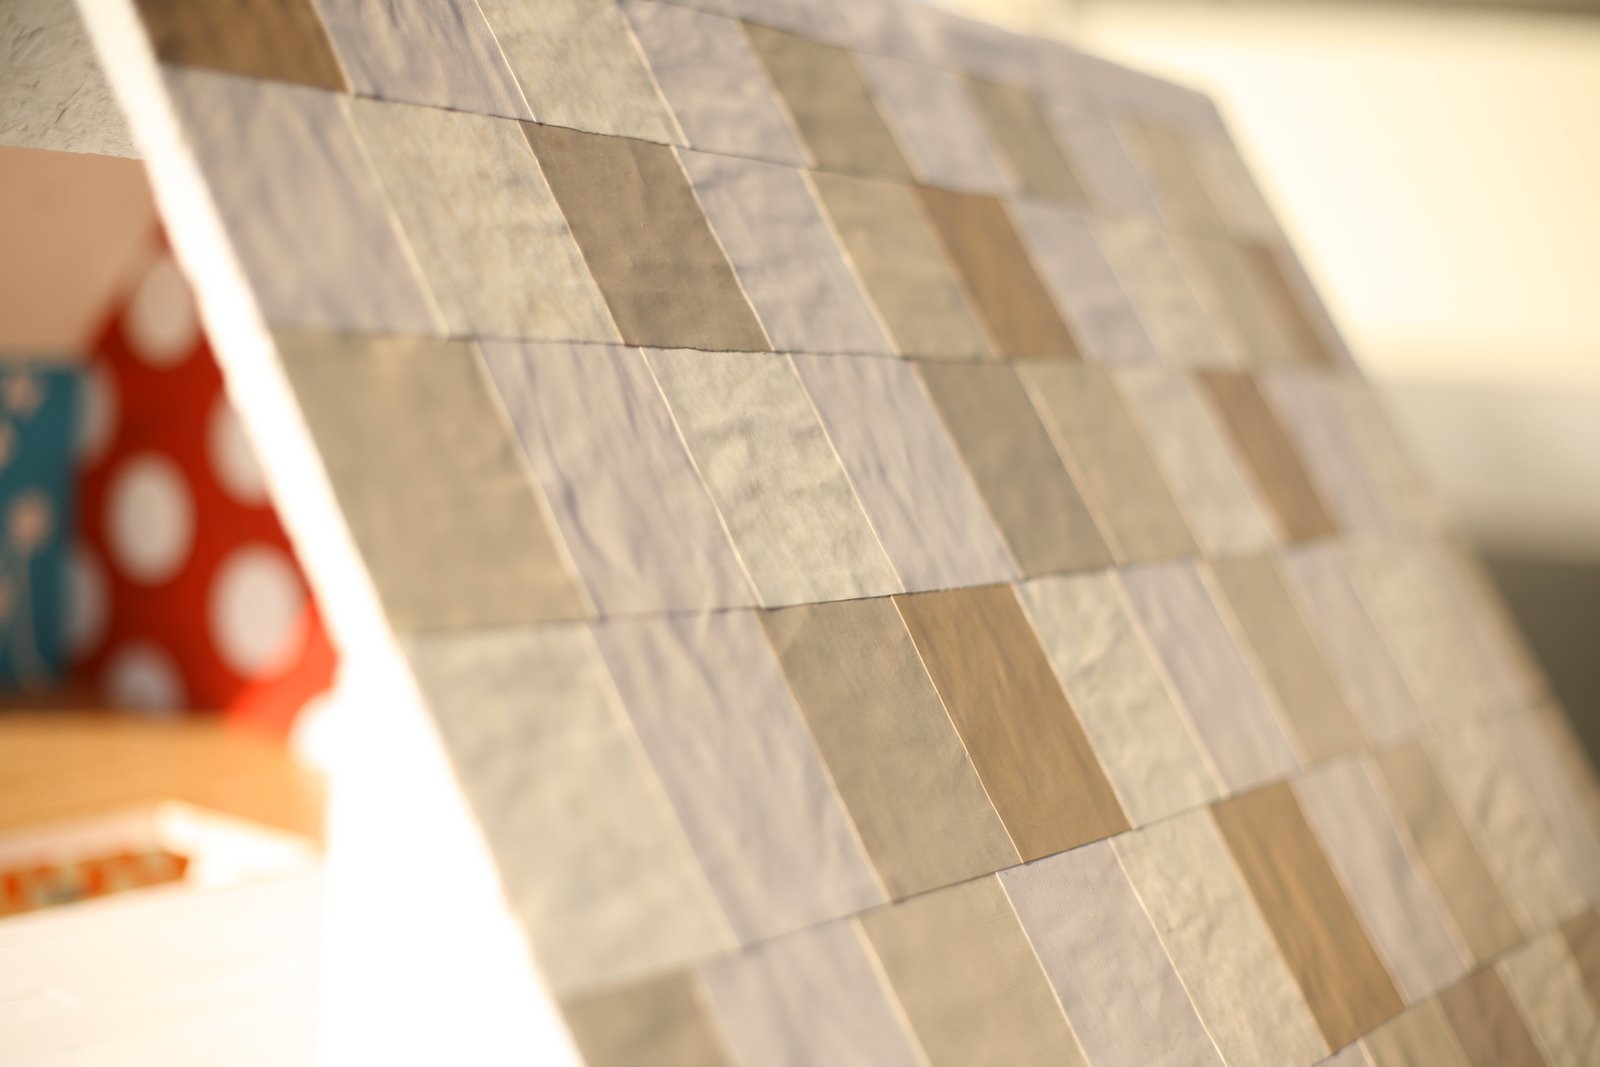
Yes, I decoupaged every single one of those shingles on..thank heavens for a helpful husband who brushed all the glue on while I placed and glued the pieces on. There were a lot of pieces!:)
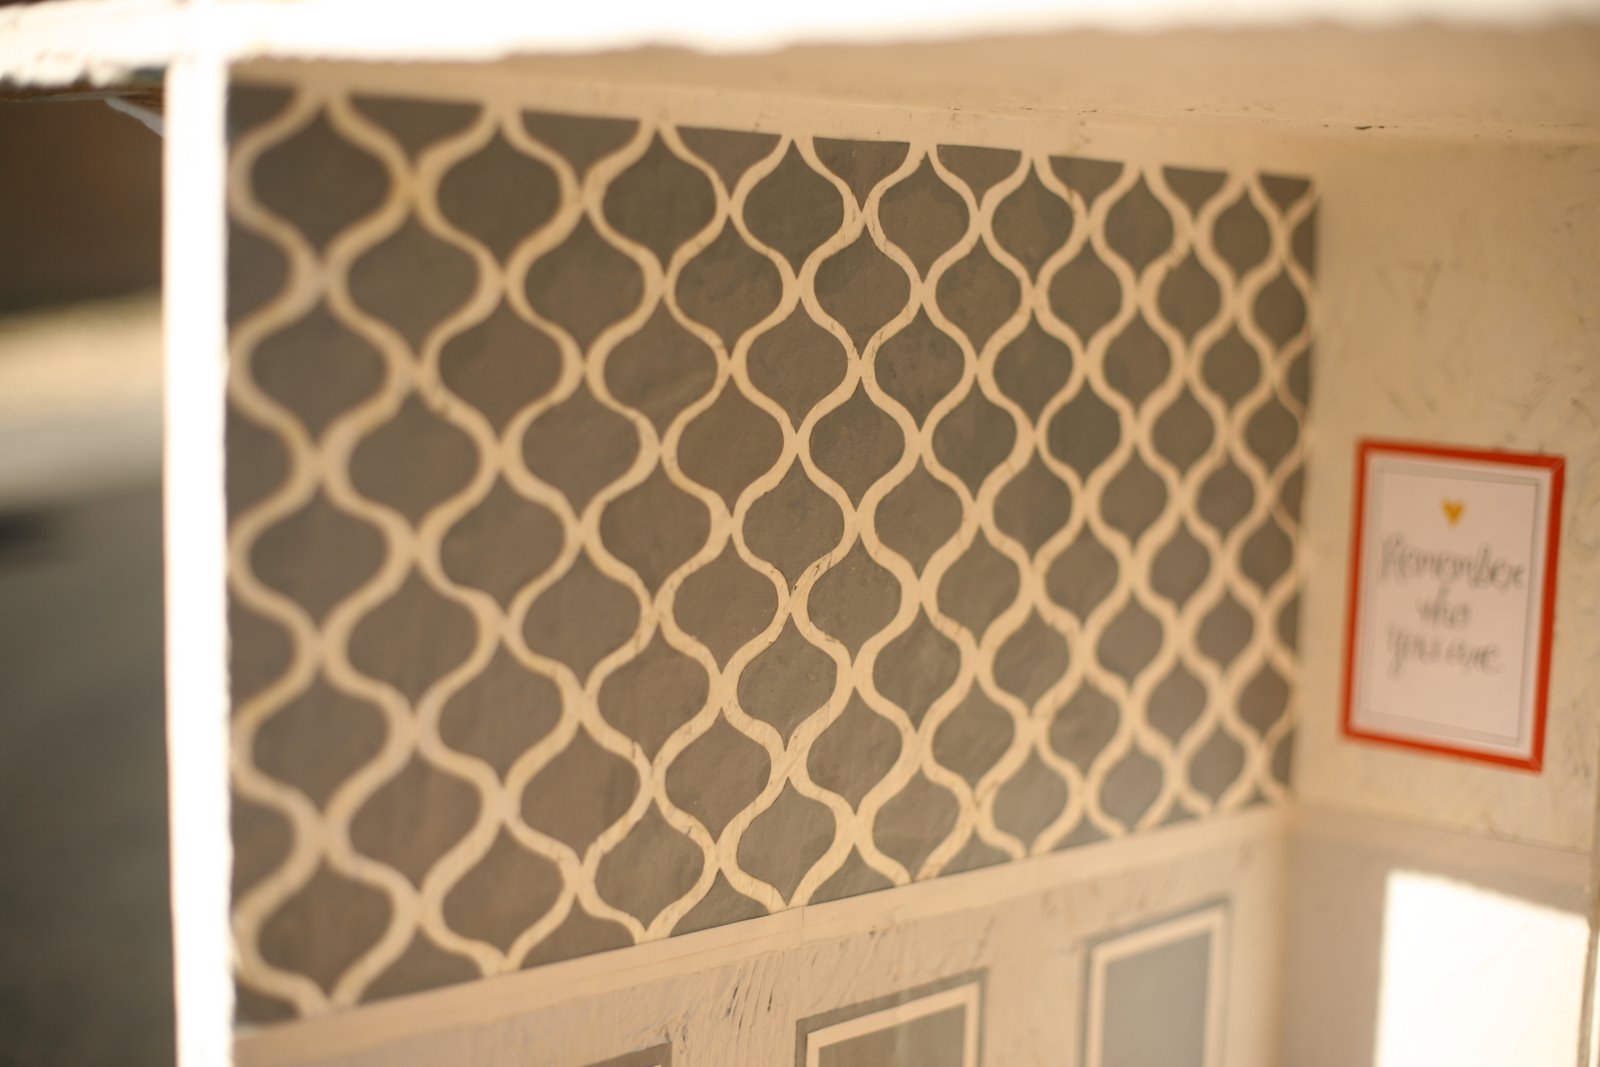
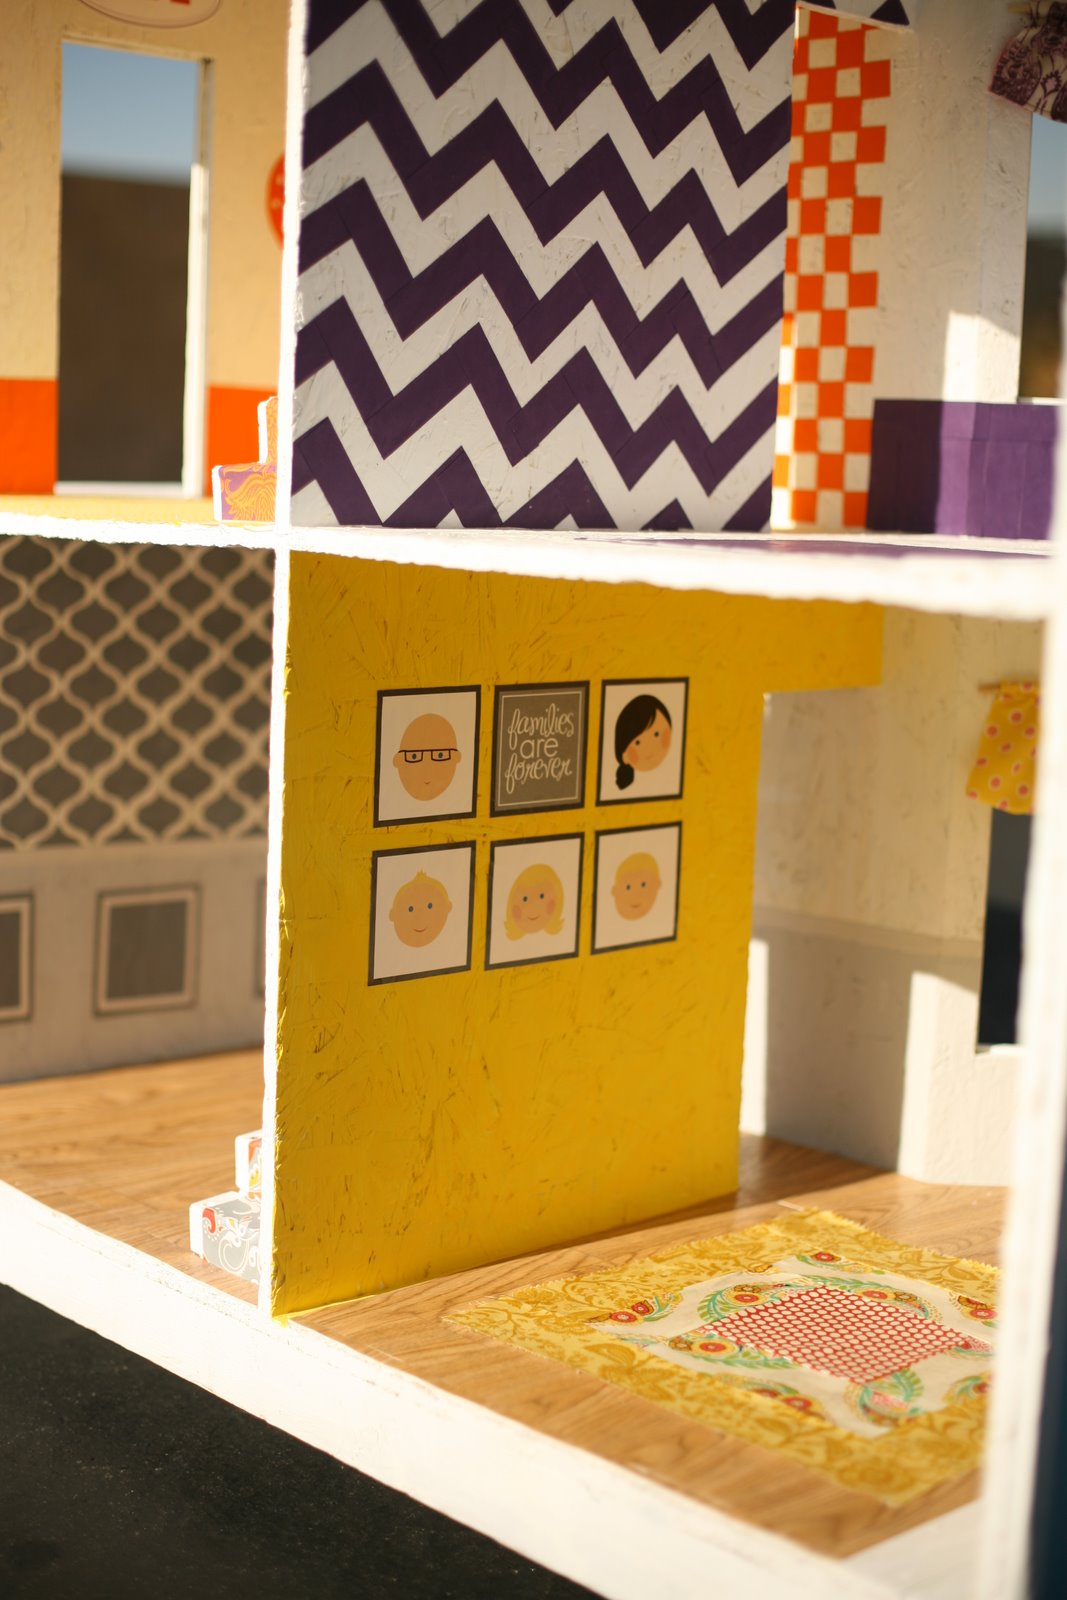
This was by far my favorite wall. It was the first one I did…and yes, each of those little gray designs is a little piece..each stuck on and placed by hand. LOVE how it turned out.
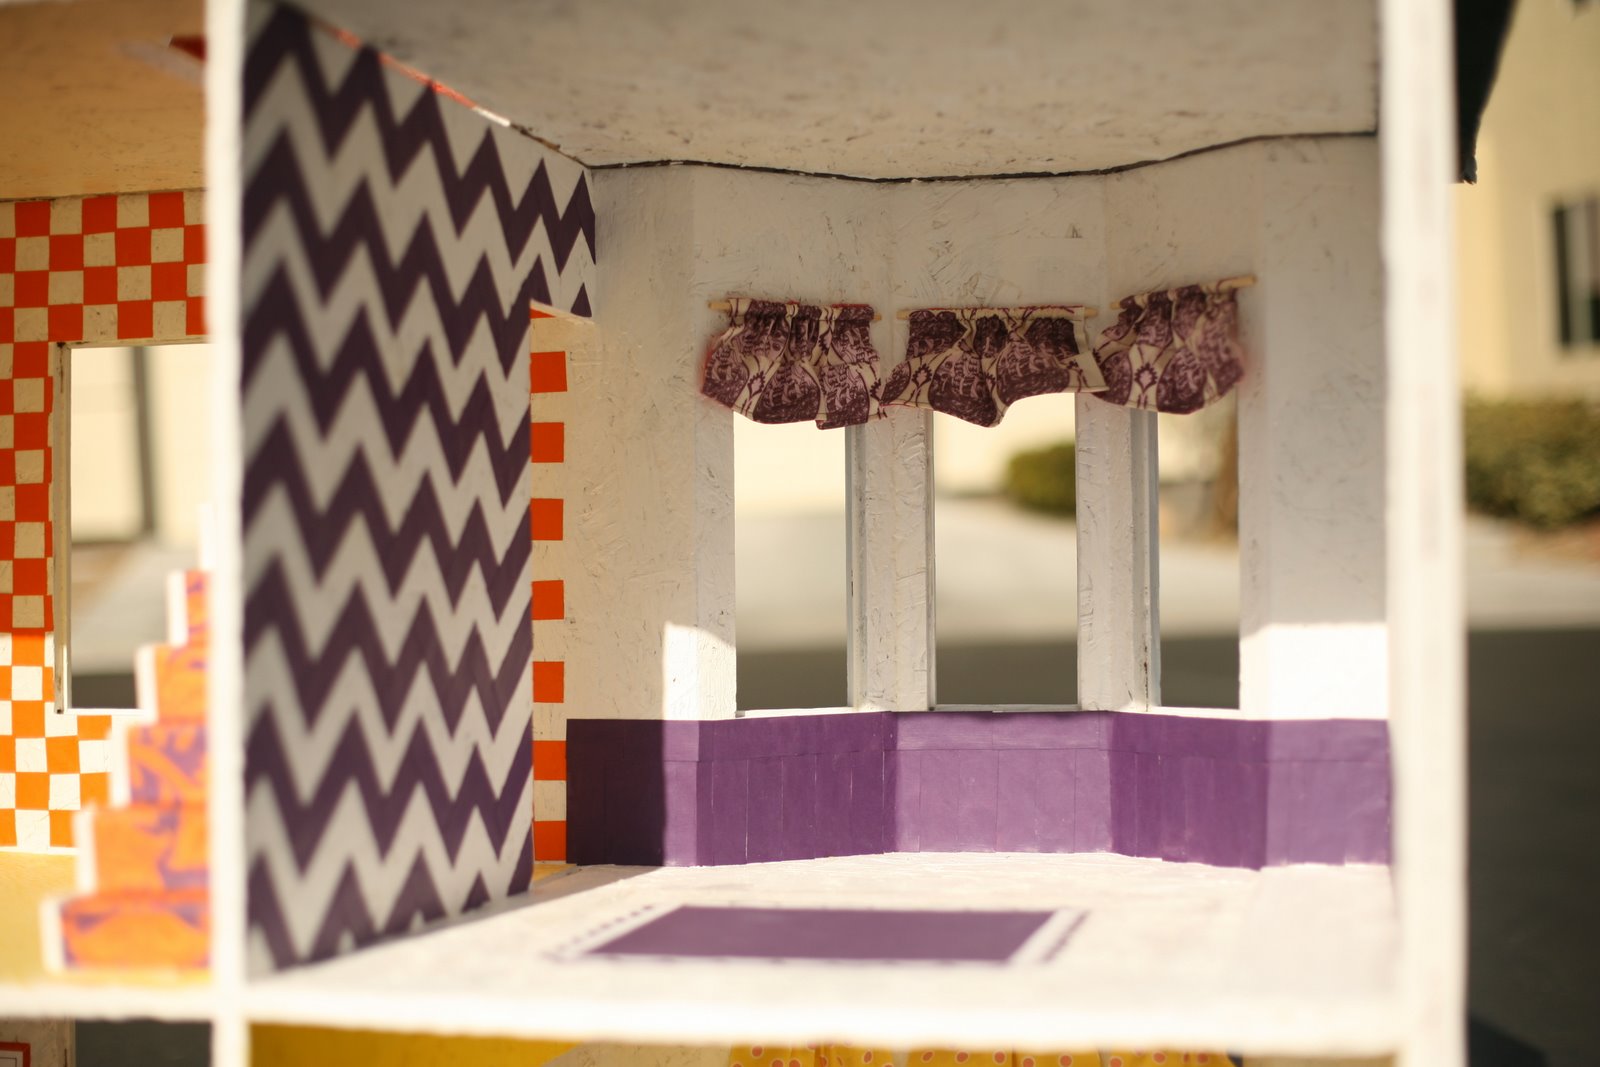
I made our family into a little cartoon..just a fun little detail that my little girl already loves looking at and pointing to everyone’s faces..and of course a little fabric rug to warm up that wood floor!
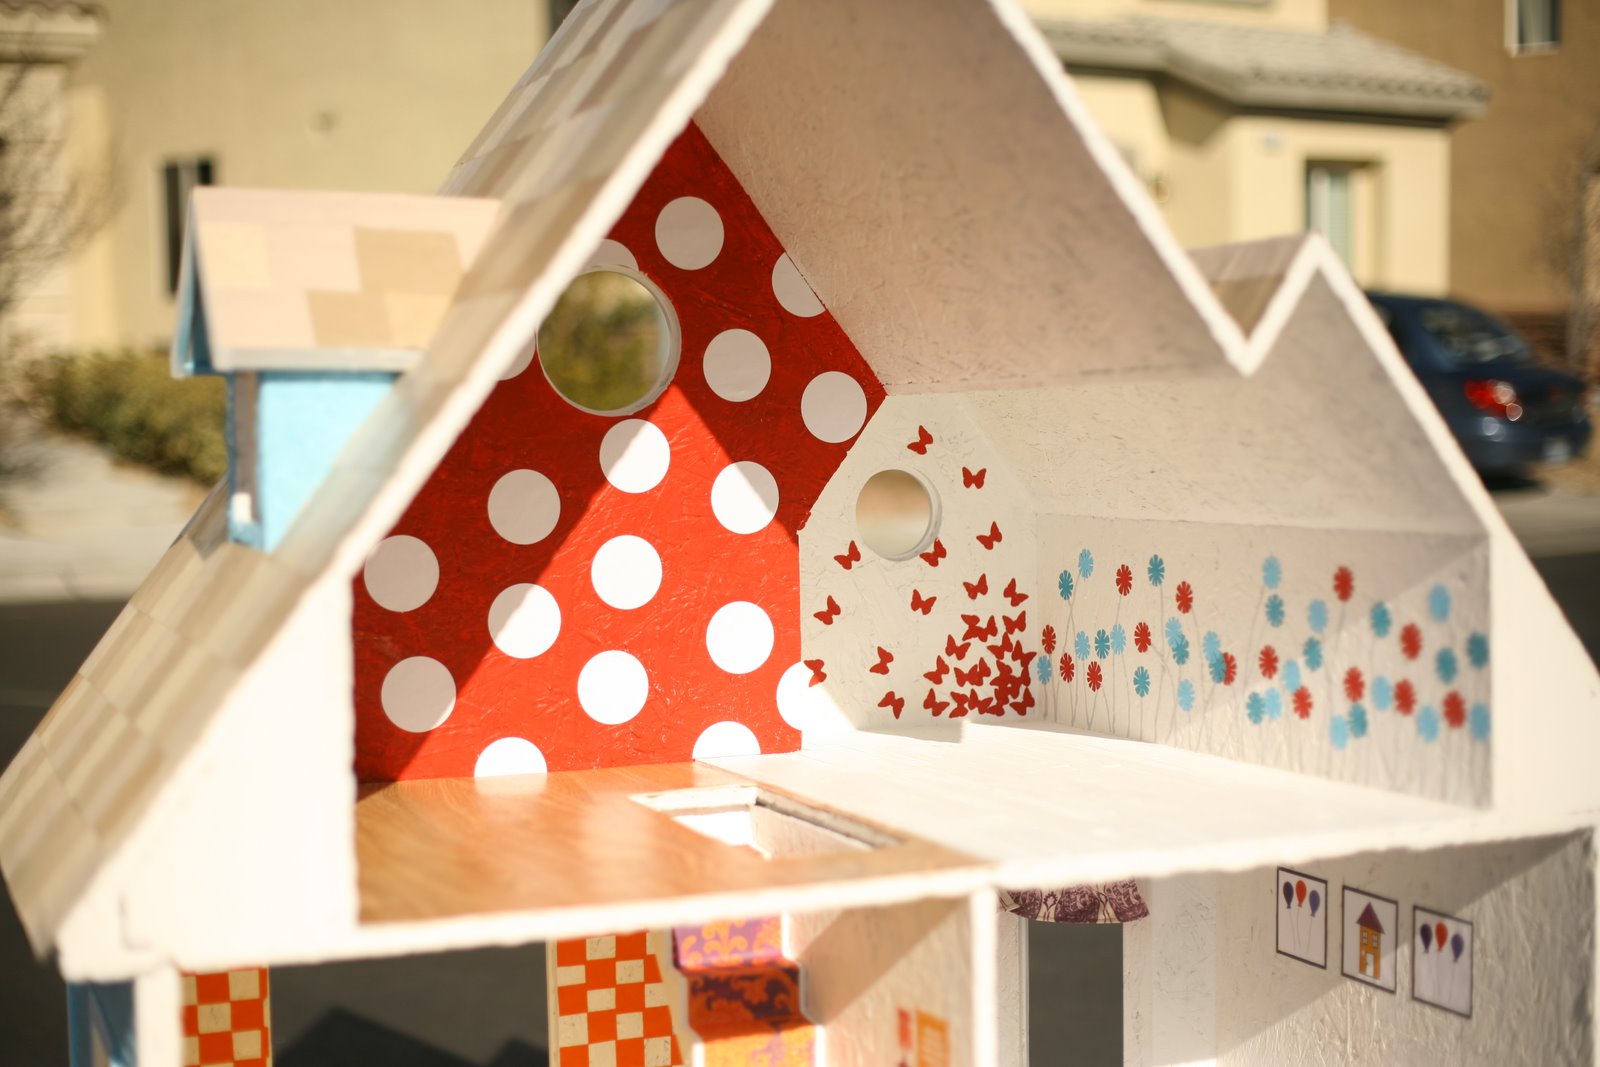
I love the little butterfly corner..and the flowers add a bit more whimsy!
pictures by Sweet As Honey Photography.
linked to:
whipperberry
If you liked this post, and I hope you did, please become a follower! Thanks a million.


