
This post is sponsored by Flora Craft® Make It: Fun®, but as always, the opinions are all of my own.
Who LOVES fall?! I am loving getting my house all decorated for fall and today’s project is a fun, trendy project that will bring fall right into your home!
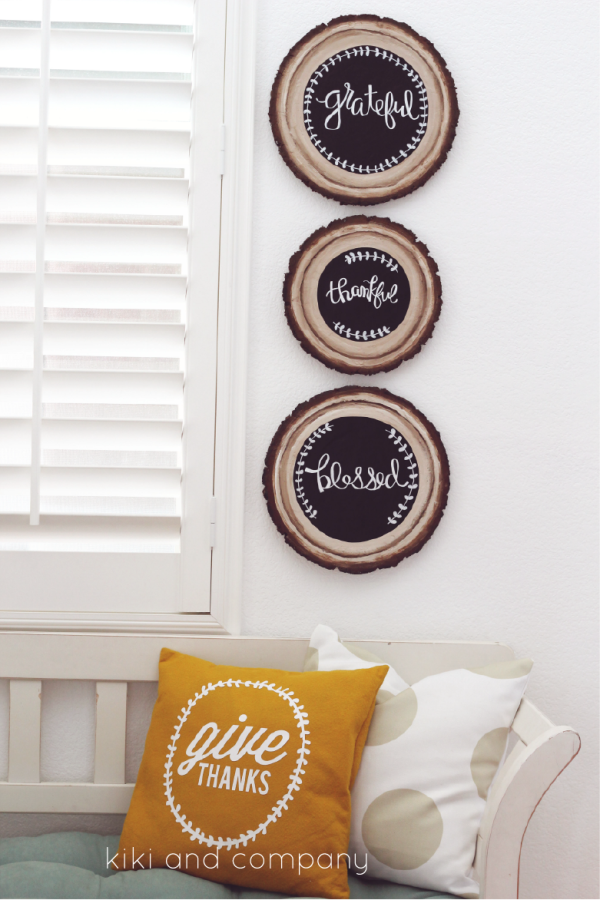
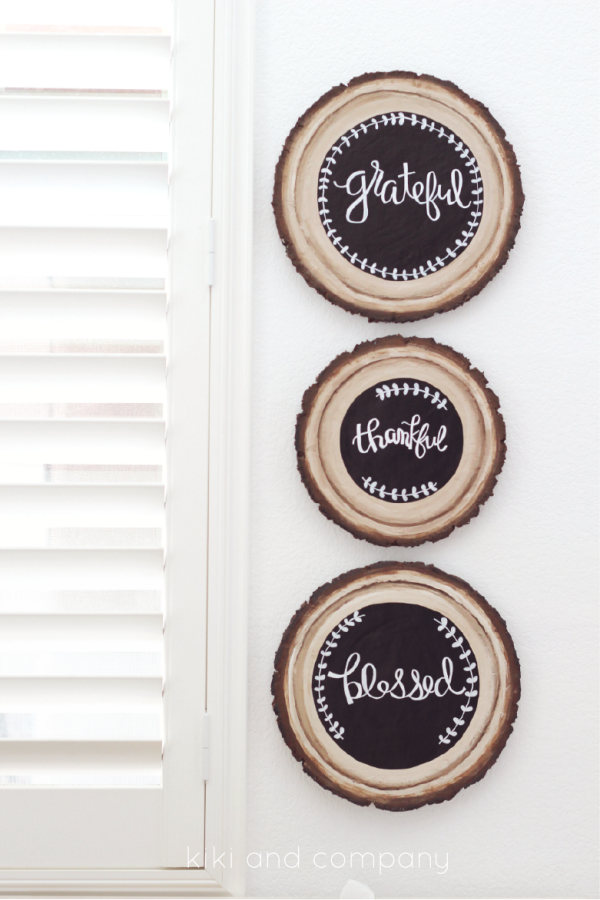
Today, I am using some really fun products from FloraCraft® Make It: Fun® line to make this DIY Wood Slice Chalkboard Sign. I have been wanting to try to make one of these forever, so I was really excited to try it out.
To start off, let’s get our supply list.
SUPPLIES
- FloraCraft® Make It: Fun® Foam Discs
- FloraCraft® Smooth Finish®
- FloraCraft® Make It: Fun® Foam Cutter
- Paint in browns, white and black
- Paint brushes
- Black vinyl
- Chalkboard Marker
- spatula or putty knife
DIRECTIONS
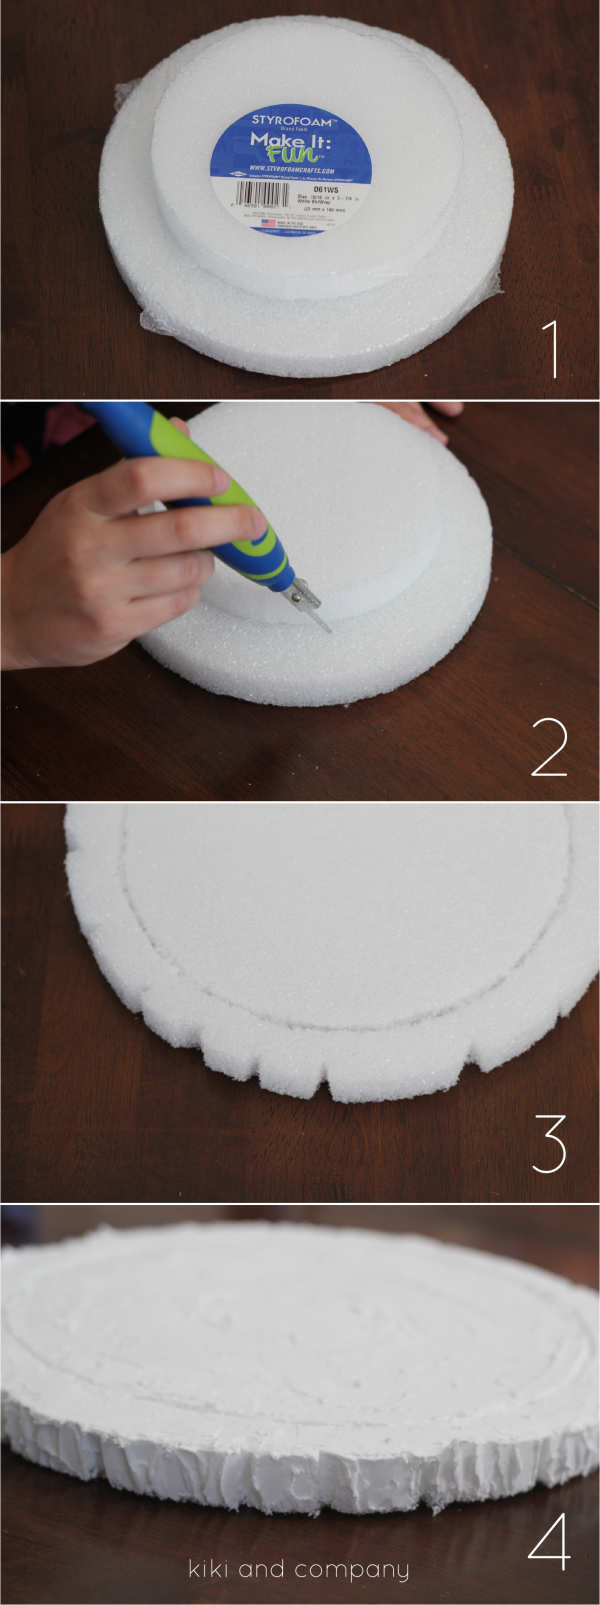
- You are going to want to grab a few sizes of the discs. Get two discs that are one size away from each other to start out.
- Using the smaller disc as a guide, cut around the Styrofoam down just a bit with the foam cutter.
- Cut random notches out of the outer edge around the sides.
- Using a spatula or putty knife, add the Smooth Finish® to your Styrofoam. {It’s a lot like frosting a cake.} Make sure to use the spatula to get down in the ring you just cut. To do the outer edge, use the spatula in a vertical up and down motion to fill in all of the space.
- Let it dry!
- After you let it dry, I used a really fine sandpaper to sand off just the middle of the disc. This will make it smooth and will make it easier for your vinyl to stick and stay!
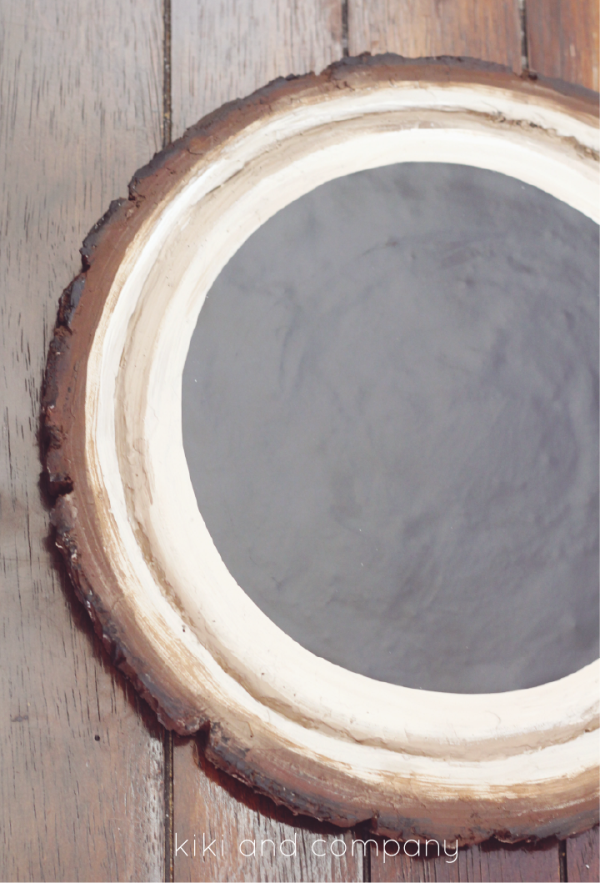
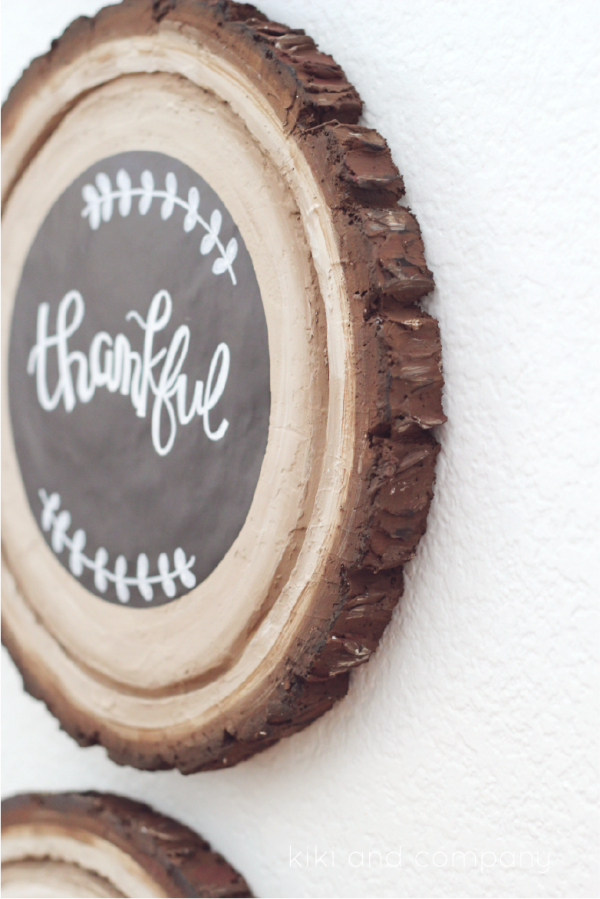
- Paint! I started on the outer ring with a medium dark brown. After filling the outside in, I painted about a 1/4″ circle on the top outside edge. Then take a lighter brown and maybe a reddish brown and add some detail to the trunk by just using sparingly. I ended using black to give it some depth.
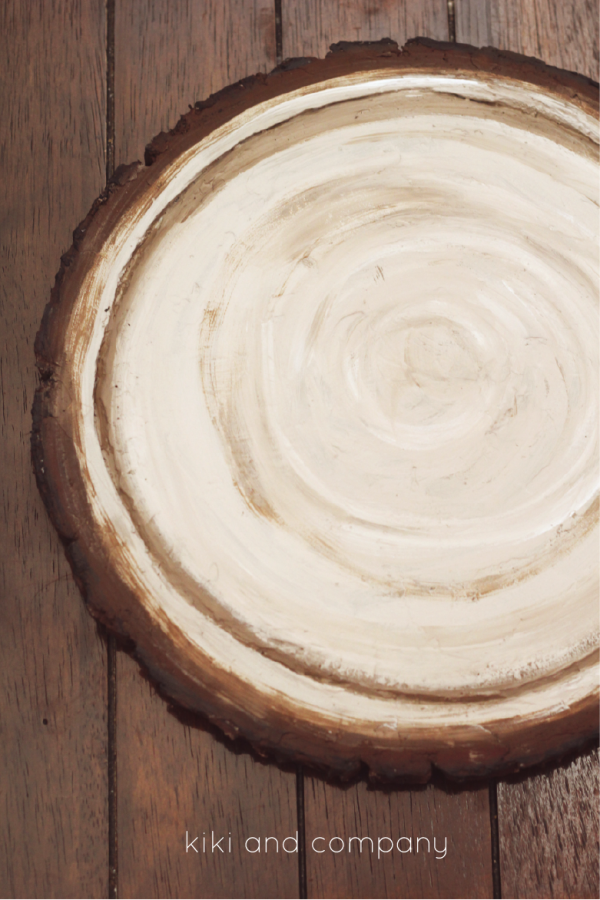
- Now take your black and go around the top outside edge blending in to the medium dark brown. Using the white and your medium dark brown, mix to make a lighter brown and paint the rest of the circle. Using variations of lighter and darker browns add rings and blend. Let dry.
- Cut a circle of black vinyl (I used 2 sizes smaller of the discs to get the size I wanted) and adhere to the sign.
- Then just hand letter what you want to say on your sign with a chalkboard marker. When you want to change it up, DO IT! It will be so fun to have these signs around for the different seasons.
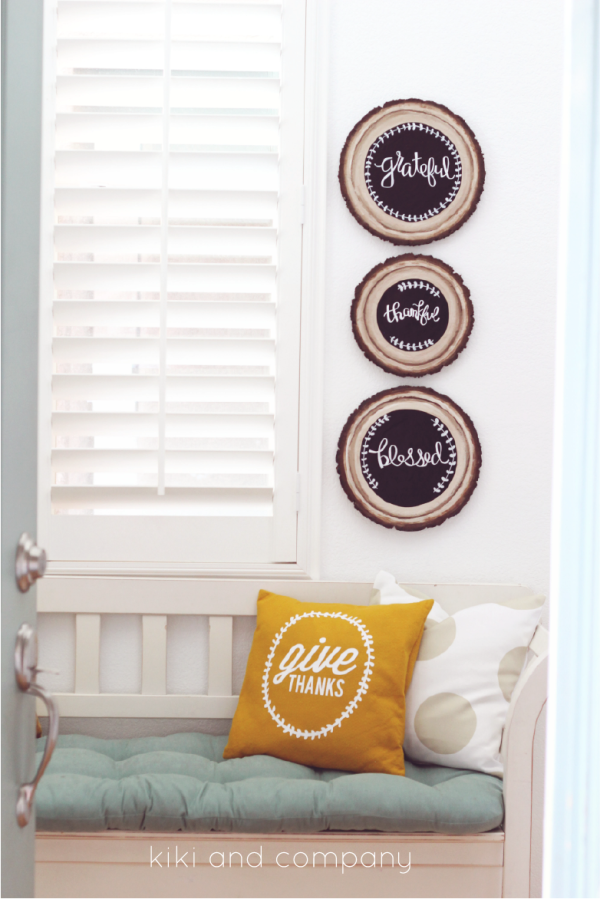
- I hung the signs by gluing some paper on the back of the sign and using Command Strips, adhered them to my wall!
They really are so fun to decorate in so many ways…
Here you can see the detail in the bark and the wood…pretty fun, right?!
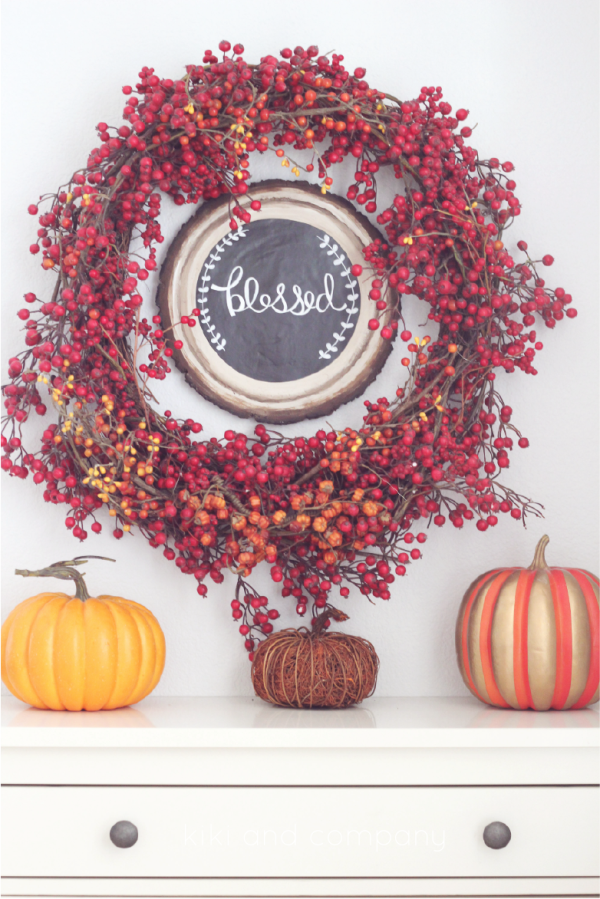
It looks fun in the middle of a wreath..
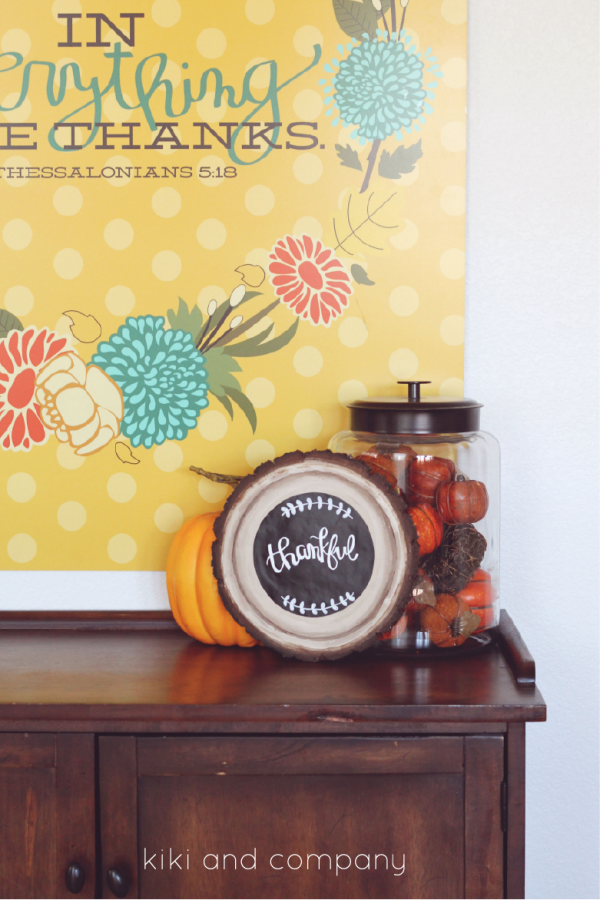
Or used as a sign in a vignette.
However you use them, these signs are fun and can take you through season after season. Hope you enjoy the process of making this project…and hope you’ll show it off and tag me at @kikicomin on Instagram or share on my facebook page!
Happy Fall!


